
A finished design is only one possible starting point. You may already know the coffee weight but still be choosing a material. You may have a label that works on your current bag and want to move to printing across the whole package. Or you may need several coffees to share a recognizable layout while keeping their names and information distinct.
Those starting points call for different conversations. The useful first step is to explain what you want the bag to do and which decisions are open. We then connect the design to its physical panels, filling opening, seals and features. This guide shows how to prepare that conversation without turning yourself into a packaging designer first.
What you can send before you have a finished design
A logo and a few words
Start with your brand name, logo if you have one, and the coffee information you want customers to read. A short written direction can be more useful than a folder of unrelated references: for example, a quiet front with large coffee names, a dark background with a different accent for each blend, or an illustrated front with most product information on the back.
Explain which details matter most. Perhaps the coffee name should be recognizable from a distance, your existing brand color needs to remain familiar, or a changing roast date needs its own area. Put those priorities in the message so they guide the layout from the beginning.
Send the best original logo file available, rather than deliberately reducing it to a screenshot. If a screenshot is all you have, you can still use it to begin the conversation. We can discuss how to prepare the artwork needed for your bag. Keep original photographs and graphics available as well, so the final design can use suitable source assets.
Your coffee wording is a separate input. Provide the product names, net quantities, website and other approved text you want printed. Mark wording you are still deciding. A designer can arrange your content, but the coffee description and claims should reflect what your business actually sells.
An existing label, bag or design reference
An existing package helps explain proportions, color and information order. Tell us what you want to retain and what you want to change. “Keep the logo and blend colors; give the back more space for brewing instructions” is a clearer direction than “make it more premium.”
A label can become the starting point for a printed bag, but it usually needs a new layout. The bag has front and back faces, folds, seams and possibly separate side panels. Expanding a label image to cover the entire drawing can put important words on a fold or make supporting text too small.
If you send a reference from another brand, describe the feature you like: restrained typography, a visible paper surface, a large illustration or a consistent accent color. That gives us a direction for your own packaging rather than instructions to reproduce somebody else's identity. Include a photograph of your current filled bag when its shelf shape or proportions are part of the brief.
| Your starting point | Useful material to send | The next decision |
|---|---|---|
| Logo and an idea | Logo, coffee names, color direction and approximate quantities | Bag format and a first layout direction |
| Existing label | Original label file, current bag photos and a change list | How to distribute the content across the bag |
| Current printed bag | Dimensions, material details if available and filled views | Which specification and artwork details to retain |
| Several coffees | Shared branding, text for each coffee and quantity per design | A common layout with clearly identified variants |
Choose the bag before fixing the artwork
Coffee weight, dimensions and filling space
We can discuss a visual direction while you choose the packaging. Before fixing the production layout, however, the artwork needs a bag format and agreed dimensions. A stand-up pouch, a flat bottom bag and a side gusset bag divide their surfaces differently. A design arranged for one drawing needs review before moving to another.
Start with whether you pack whole beans or ground coffee, followed by the actual net weight. For a US 12 oz pack, that is approximately 340 g. A 250 g pack is a separate size; the two should not share a weight declaration simply because they look similar on a screen.
Coffee weight does not determine one universal bag dimension. Consider how your coffee settles, the space used by the closure, the filling access and the clear area needed for the final seal. A photograph of an empty bag can show the design, while a filled sample answers the fit question.
If you are comparing shapes, use our flat bottom, stand-up and side gusset guide to make a shortlist. The coffee bag sizes page gives starting references. Tell us about your filling and sealing method before approving the size for your own coffee.
Materials, printing and opening features
The surface beneath the artwork matters. A white film, brown kraft paper and a metallized construction can produce different visual effects with the same graphic. Tell us whether your priority is visible paper, a matte surface, a glossy finish or a specific color reference. We can discuss the complete material structure alongside its appearance.
Film thickness belongs in the physical specification, separately from coffee net weight. A 140 µm laminate is 0.14 mm thick; it is not a 140 g coffee capacity. Likewise, a paper exterior does not describe every layer of the bag. VMPET is metallized PET, which differs from a separate aluminum foil layer.
Valve, zipper and first-opening choices also affect the layout. Leave room to review them on the actual drawing. Important lettering should remain readable around folds and seals, and decorative artwork should accommodate the agreed feature positions. If you need an area for a roast date or lot code, explain the coding method and intended location.
Printing comes into the discussion when we know the material, design versions and quantities. You do not need to select the process from a logo file alone. A useful brief gives us enough information to compare the proposed printed bag as a whole.
Give each panel a clear job
Front recognition and back information
Decide what a customer should see first. The front might carry the brand, coffee name and one distinguishing graphic. The back can hold a longer description, contact details or preparation information. This arrangement is a design choice; you can change the balance to suit the way the bag is displayed and sold.
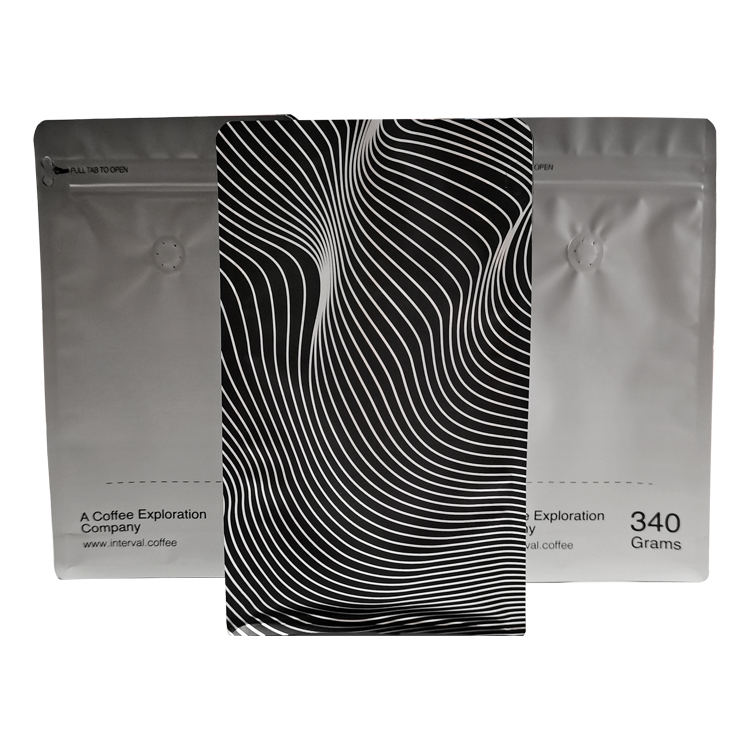
Our digitally printed flat bottom bag with a pull-tab zipper shows a pronounced separation between a dark, white-line patterned front and gray back panels. We made it for 12 oz, approximately 340 g, in 15 × 26 + 6 cm, using MATOPP / VMPET / PE at 140 µm. It combines digital printing, a degassing valve and a pull-tab zipper.
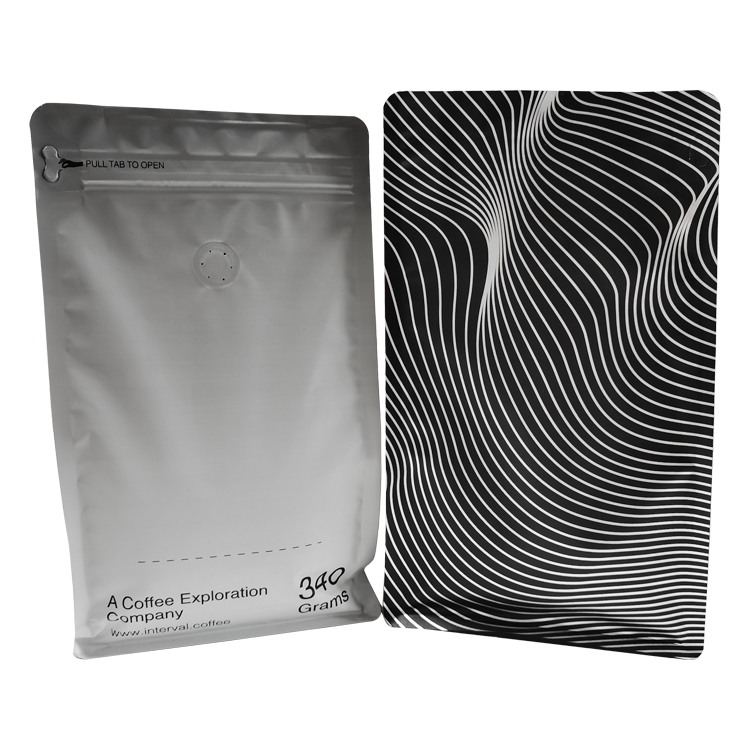
For your own design, this is a useful way to think about priorities: which surface introduces the coffee, and which carries the detailed information? You can send a few lines describing that hierarchy before you have selected fonts or drawn the background.
Our digitally printed matte stand-up pouch for 10 oz beans offers another layout reference. Its specification is 16 × 24 + 4 cm, MATOPP / VMPET / PE, 140 µm, digital printing and a degassing valve. The intended coffee fill is 10 oz, approximately 283 g.
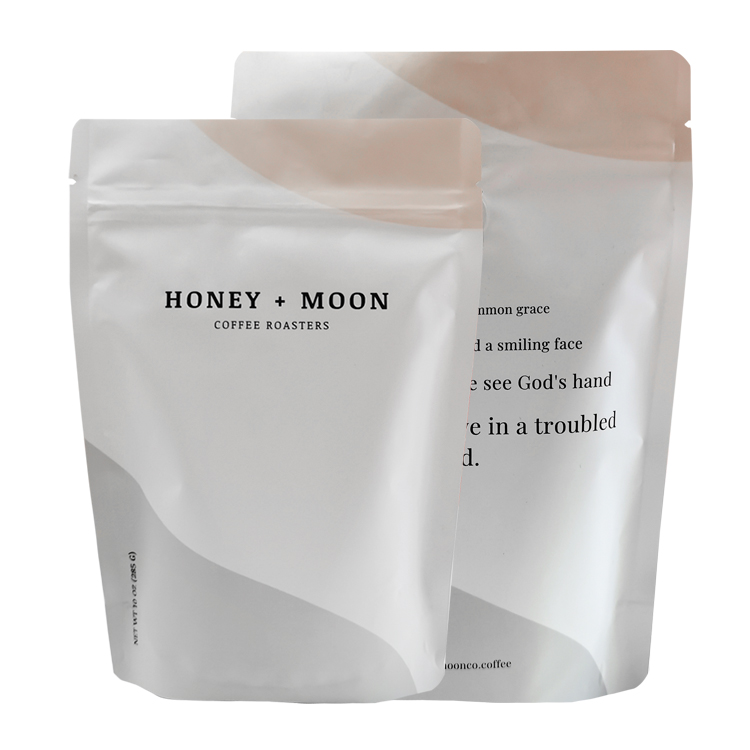
The two products demonstrate different ways to distribute a design. They do not establish one preferred bag for every brand. Use the photographs to explain the balance you want, then check that the wording fits your selected panels at a readable size.
Side panels, folds and opening areas
A flat bottom bag can give its sides a separate role in the design. You might use them for repeated branding, a short description or a pattern. A side gusset bag also offers side surfaces, but those surfaces fold inward and change their presentation when the bag is filled.
We made our 1 kg MDOPE/PE side gusset coffee bag in 14 × 40 + 7.5 cm, with 120 µm film, gravure printing and a PE degassing valve. The white front and contrasting printed side areas give you a real example of front and gusset artwork working together.
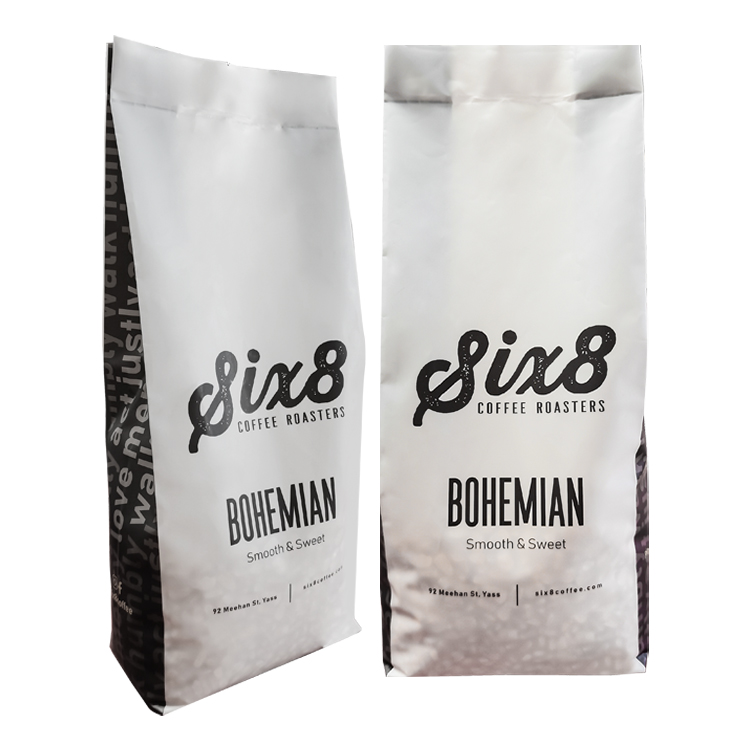
If you want artwork to cross a fold, ask to review it on the formed bag as well as the flat layout. A graphic can cross a panel boundary deliberately; small text is less forgiving. Opening instructions, a barcode and the main coffee name each need a location that works in normal use.
For a retail barcode, provide the real barcode artwork and allow for its clear surrounding space. GS1 US guidance addresses color, size and placement, including the importance of a smooth printing surface. We can plan a suitable area within your layout; verify the finished barcode for your retail requirements.
Plan several coffees as one design range
Shared elements and changing information
List what remains consistent across your coffees: the logo position, main type style, background, information order or panel arrangement. Then list what changes: blend name, origin, tasting notes, roast description, net weight or a distinguishing color. This separates a design system from the individual versions that must be checked.
Our digitally printed mono-PP flat bottom bags for 12 oz use a shared black presentation with red, white and yellow front areas. We made them in 12.5 × 24 + 7.5 cm, using MOPP / VMOPP / CPP at 140 µm, with a zipper and a degassing valve.
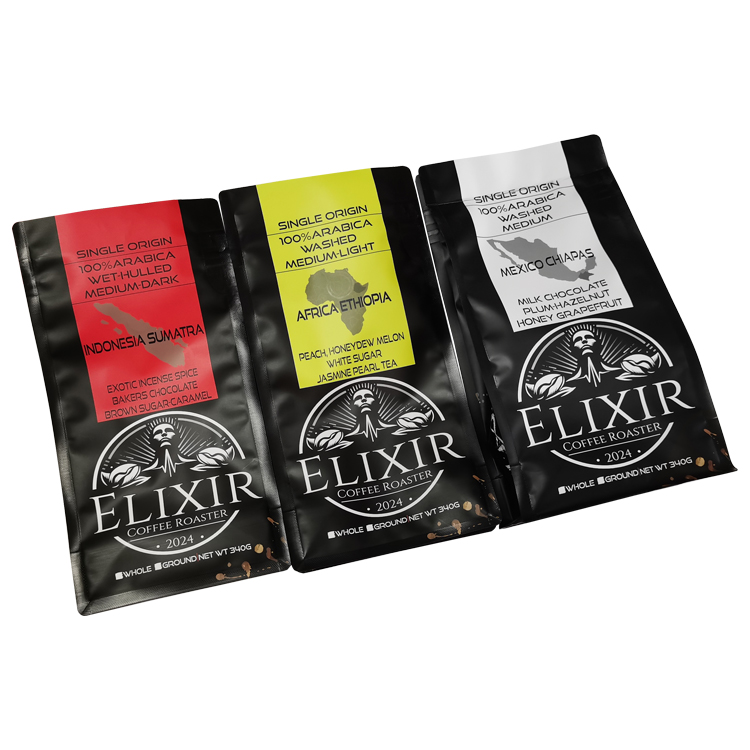
For a range of your own, the practical question is which differences customers need to recognize quickly. A changing accent can help organize the design, but the product name should also be clear. Think about the package in a small online image as well as on a shelf, where neighboring bags may hide the sides.
Keep changing product information in a simple table. Each row should identify one version, with its exact wording and weight. If one coffee is sold in whole bean and ground forms, say whether you want separate artwork, an agreed marking area or another way to distinguish them. Do not assume that a shared front layout means every back panel is identical.
Quantities for each printed version
Give the approximate quantity of each design, even if the order is still being planned. A total of “bags for four coffees” leaves open how many bags belong to each version. That split helps us discuss printing and prepare the quotation around the actual project.
You can mark uncertain quantities as estimates. You do not need to invent a sales forecast to request design help. Tell us whether a design is a regular coffee, a temporary offering or a version whose wording is expected to change. We can then consider the printing arrangement without assigning a universal quantity threshold to digital or gravure printing.
Use a version list like this, filling in your own information:
| Design name | Coffee and net weight | Approximate bags | What changes | Current wording file |
|---|---|---|---|---|
| Your regular blend | Whole bean; your stated weight | Your estimate | Blend name and tasting notes | Named file or text document |
| Your decaf | Whole bean or ground; your stated weight | Your estimate | Coffee name, description and accent | Named file or text document |
| Your seasonal coffee | Your coffee and weight | Your estimate | Illustration, product details or other changes | Named file or text document |
This is a planning template, not a production order. Its purpose is to show which artwork belongs to which quantity. Before production, each row needs to match the approved specification and current design version.
Review the first design with useful feedback
Separate layout changes from physical appearance
Review the first proposal in a sensible order. First check the information hierarchy: can you find the brand and coffee name, and are the supporting details in the right place? Next check the exact wording. Then look at graphics, color direction and how the design fits the bag.
Feedback is easier to act on when it identifies the element, the location and the change. Instead of “the back looks busy,” say “move the preparation paragraph below the coffee description and give the barcode its own clear area.” Instead of “the logo is too small,” say which panel needs a larger logo and whether another element can move to make room.
Some changes involve the physical bag. More filling clearance, a different zipper or a larger side panel may require the drawing to change as well as the artwork. Tell us what problem you are trying to solve so the design and specification can be considered together.
A screen image is useful for checking content and arrangement. It does not establish exactly how a brown paper surface, white ink or a matte finish will look in your hand. Identify any color or finish that is central to your brand and discuss a suitable physical reference or sample before treating that appearance as settled.
Adobe describes bleed as artwork extending beyond the trimming boundary. For a coffee bag, use the margins and feature areas on the drawing supplied for your specific project. We prepare those details with the agreed bag and printing requirements; you do not need to choose a generic bleed measurement from an unrelated template.
Keep one current version for each coffee
Consolidate comments before sending them where possible. If different team members review the design, agree one change list that identifies the affected coffee and version. That prevents contradictory comments from becoming competing instructions.
Review the revised proof itself. A comment may have been resolved, but a change elsewhere can affect spacing or wording. For a multi-design range, check every version after a shared layout change rather than approving one bag as a substitute for all the others.
Give approval a clear object: the named design revision and the bag specification it uses. Keep those together for the order and future reprints. If you later change the weight, coffee information or format, return to that baseline and identify the difference. It is much easier to revise a known file than to decide which image in a long conversation was final.
What our free design service includes
Unlimited revisions and approval
Our free coffee packaging design service helps you develop the graphics, colors, wording placement and layout for your custom bags. You can start with an idea, a logo or existing artwork. We offer unlimited revisions at no design charge until you approve the design.
That lets you refine the proposal around your brand and the chosen packaging. Give us your priorities and specific feedback as the design develops. If the size, material or features change during that process, bring the change into the conversation so the artwork remains tied to the right bag.
Free design does not make every physical step free. Custom samples, bag production and delivery are separate items. Keeping those items clear from the beginning helps you choose which questions to answer on screen and which need a physical sample.
Free layered production files
After design approval, we provide the layered production files free of charge. Those files organize the approved artwork and relevant production details for the agreed bag dimensions and printing requirements. A flat preview image shows the design; the layered files support the production handoff.
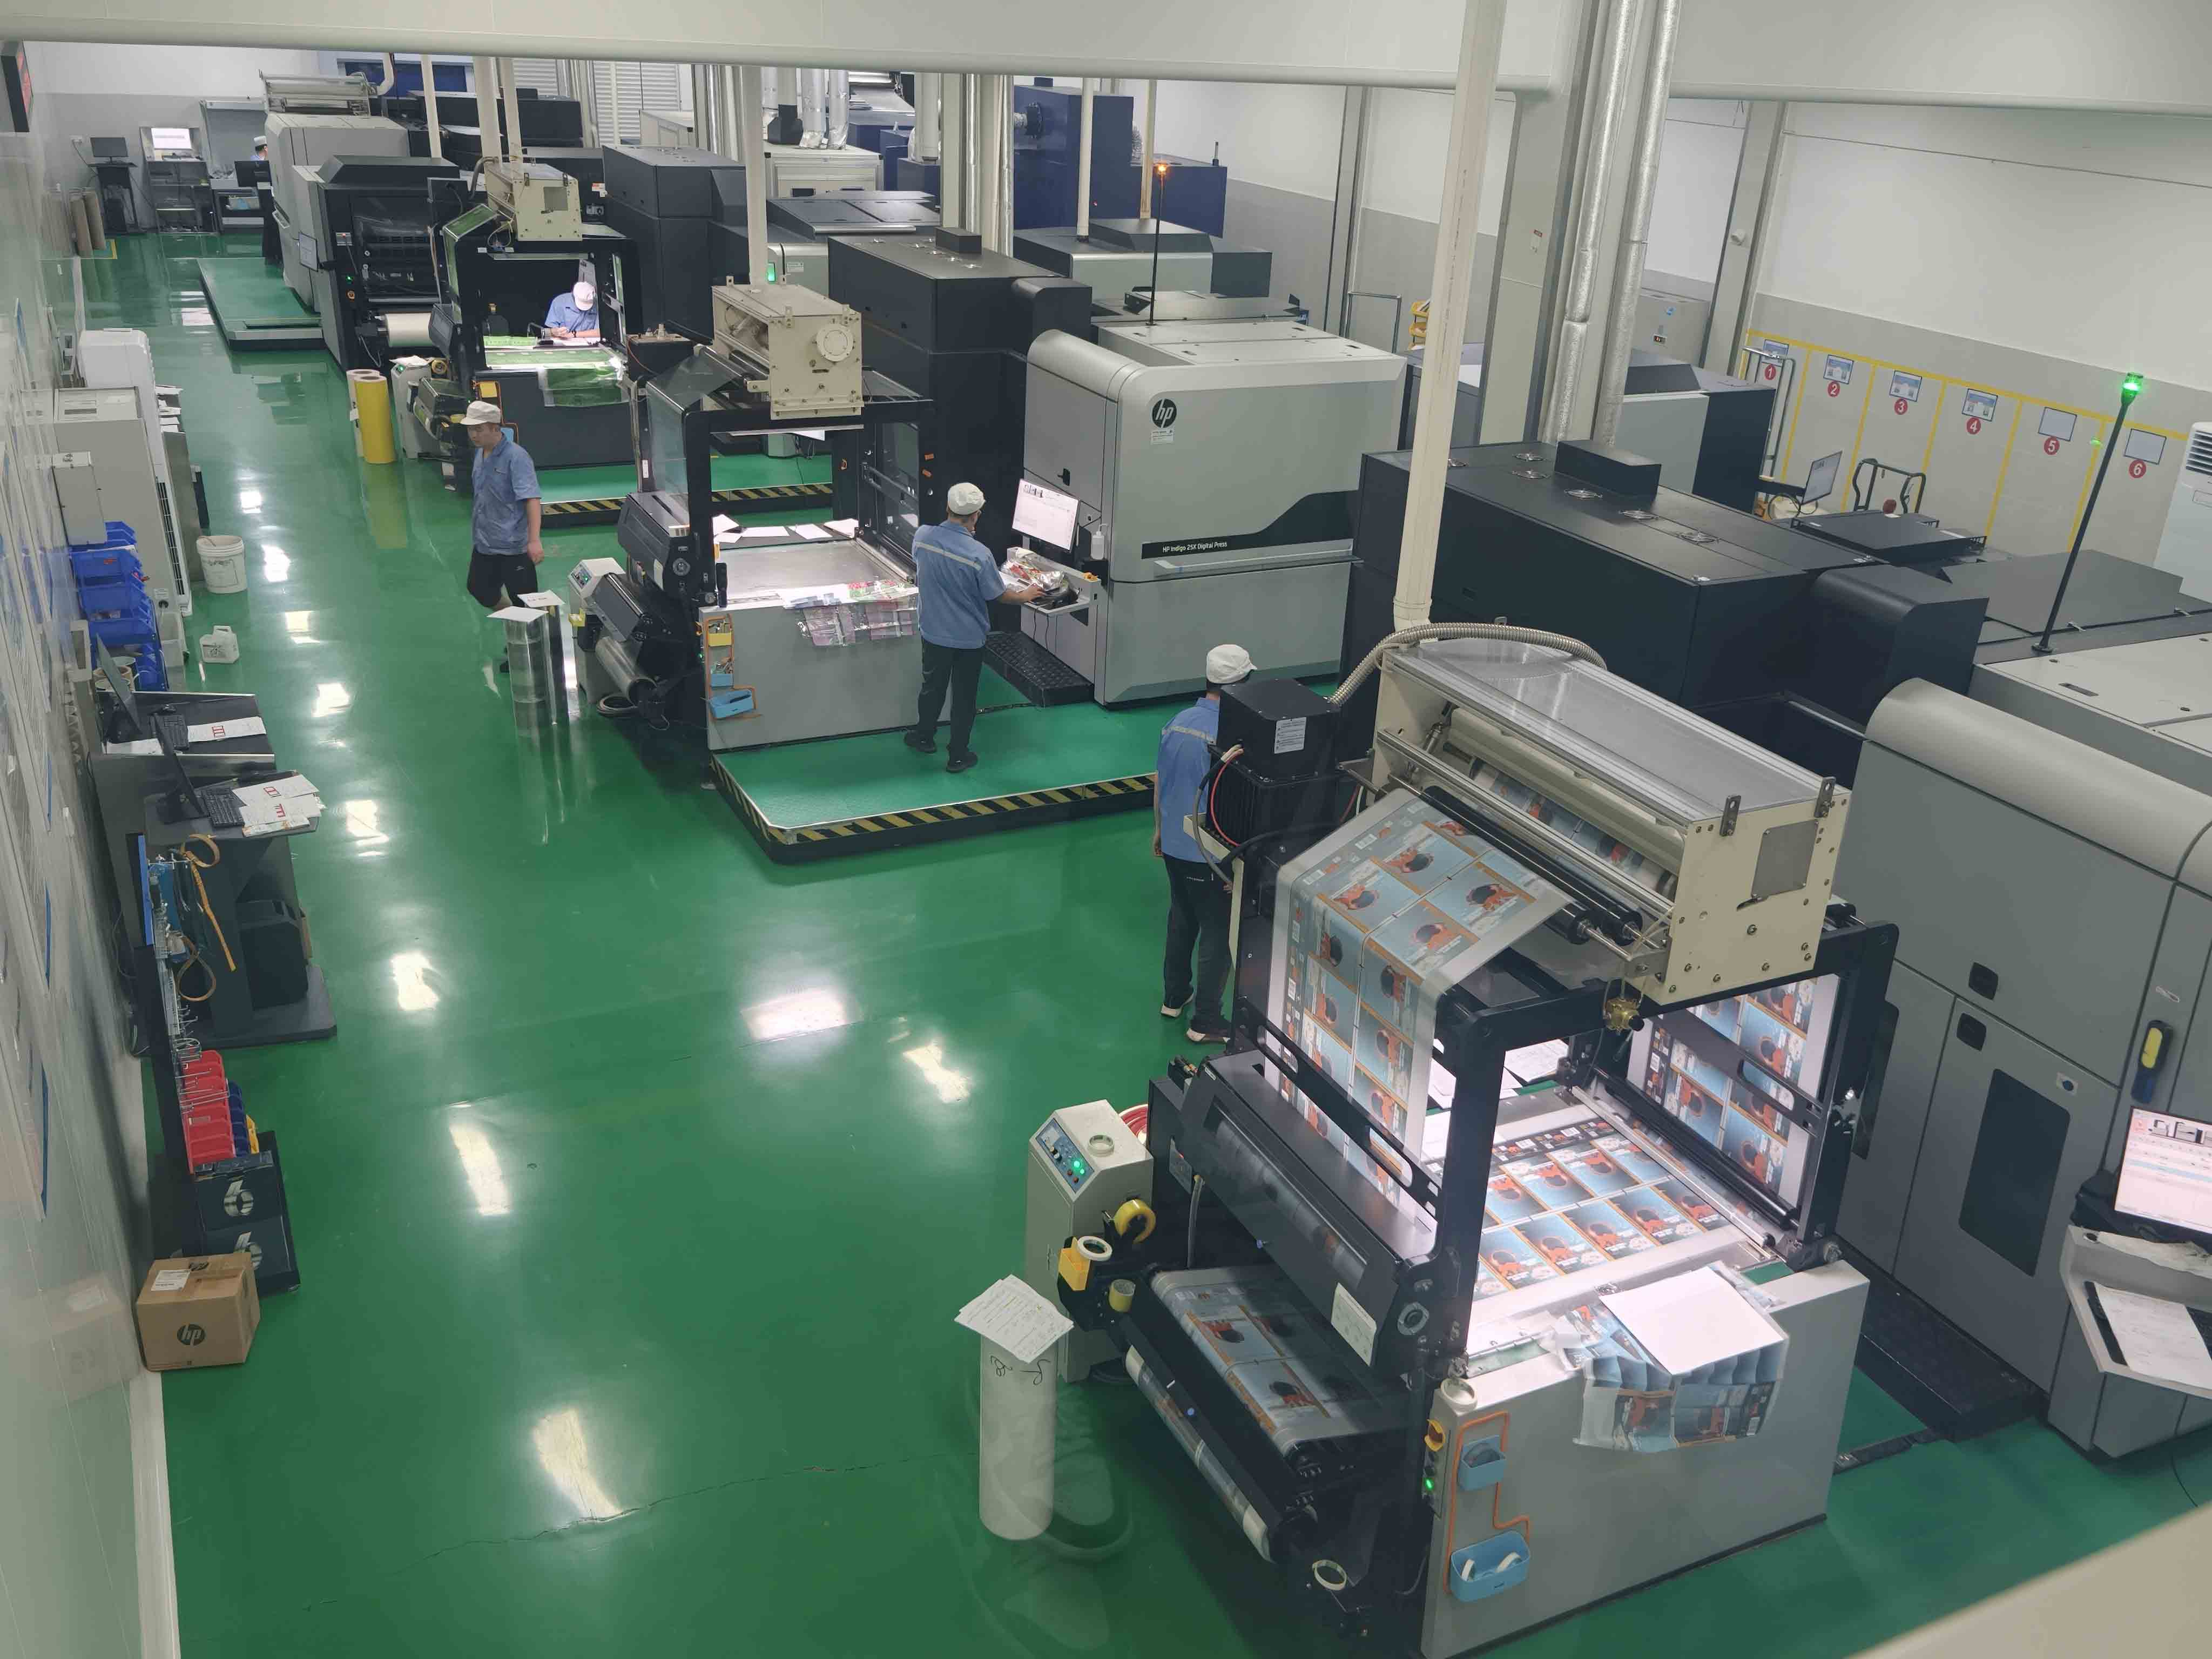
You do not need to build a production file yourself before asking for our help. If you already work with a designer, share the available source files and explain who will provide the coffee text and review the revisions. We can coordinate the bag layout and file requirements with the materials you supply.
For the final file review, use our Coffee Bag Artwork Checklist. It covers the detailed checks for the drawing, layers, images, fonts, colors and proof. Keep that checklist for the handoff stage while this guide helps you prepare the initial brief and the decisions leading to it.
Use samples to answer the remaining questions
Similar-material samples and custom samples
Samples of similar materials are free. They can help you handle the material, compare a surface finish or see features present on that reference bag. Ask which parts of the sample correspond to your proposed specification, especially when its size or closure differs.
A custom sample is arranged around an agreed scope. It might be needed to examine your particular dimensions, features or printed appearance. Custom sample fees are refunded when you place an order. Sample shipping is quoted according to the destination, so include the receiving country when requesting samples.
Choose a sample by the question it needs to answer. If the question is how a material feels, a similar-material bag may be useful. If the question is whether your coffee fits below your selected closure, review the size and feature arrangement needed for that check. If a specific printed appearance is essential, discuss the appropriate custom sample and color reference.
Filling, opening and print appearance
Try the intended coffee and filling process. Check that the bag opens conveniently for filling, the coffee stays clear of the top seal area and the selected closure remains accessible. A paper mockup can help you discuss artwork placement, but it cannot establish how the real film seals on your equipment.
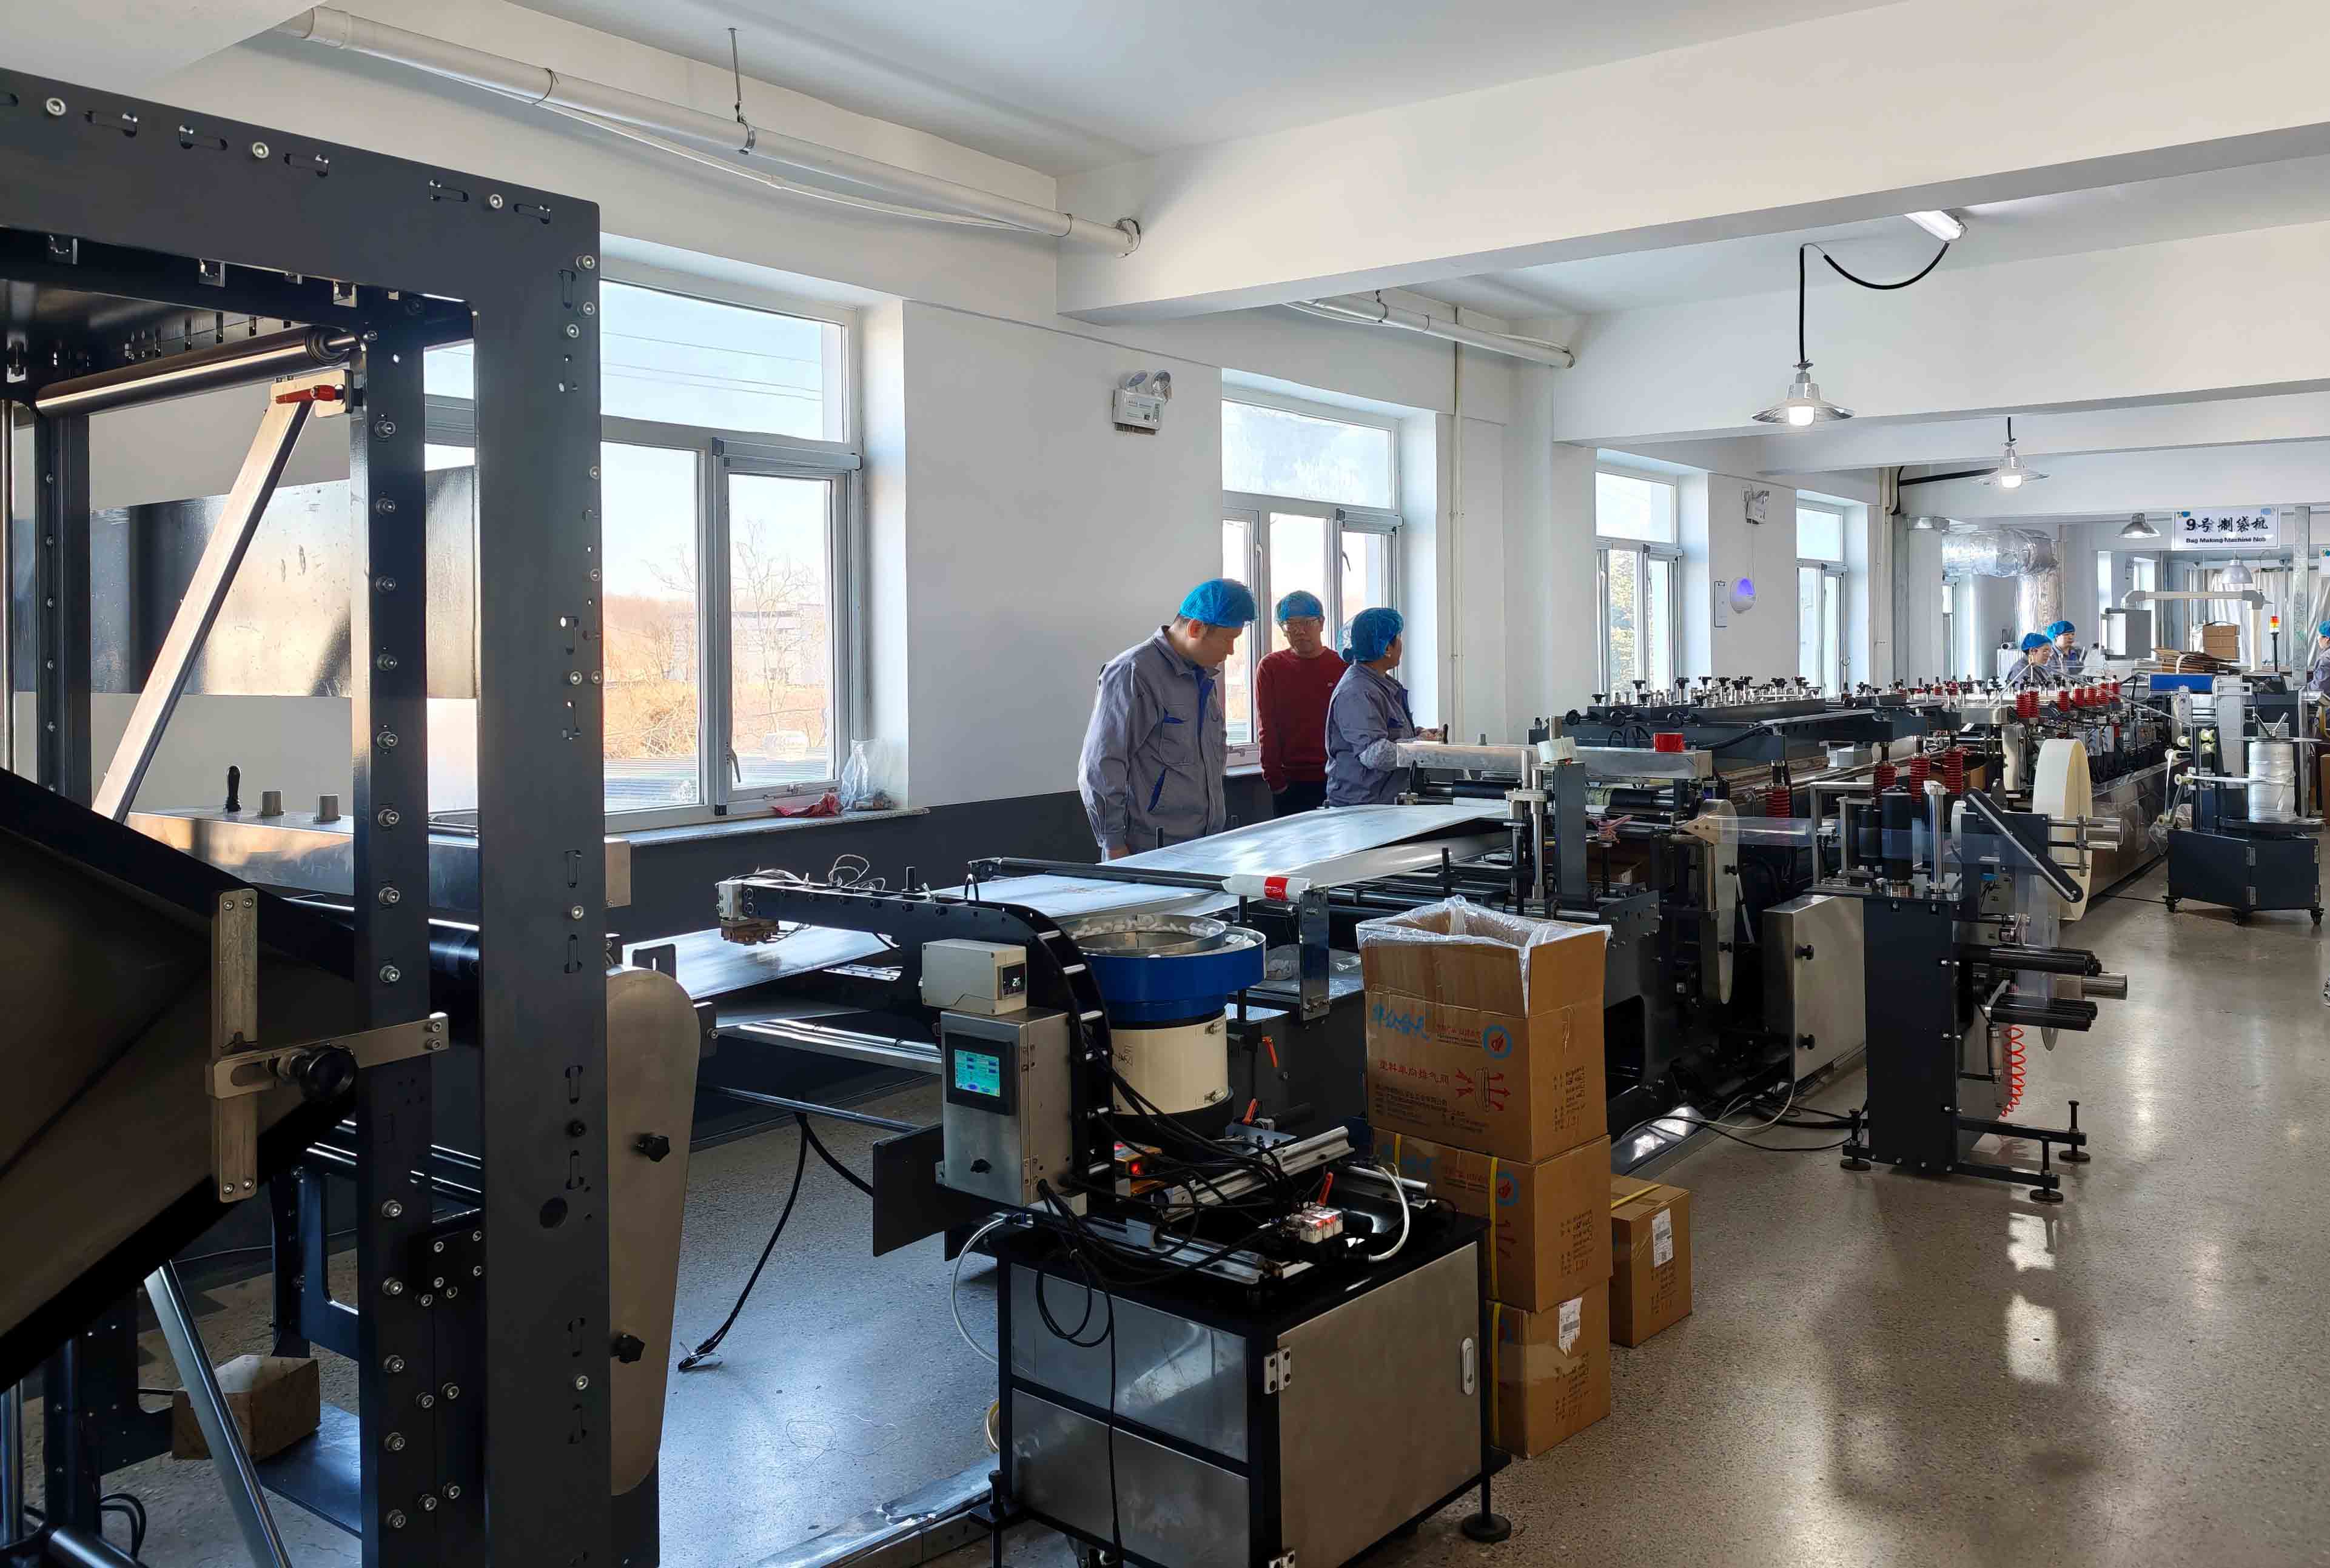
Review a formed bag from the front, back and sides. Confirm that folds do not obscure important wording and that opening the package does not remove instructions you expect the customer to keep. For a resealable format, try the first opening and reclosure as separate steps.
Our sample-testing guide explains how to record these observations. A successful fit check helps settle the packaging configuration; any shelf-life or measured performance requirements need their own agreed evaluation with your coffee and storage conditions.
Send a brief that moves the project forward
You can copy the following headings into your message and fill in what you know. Leave undecided items as questions rather than delaying the first conversation until every specification is final.
- Coffee: whole bean or ground, product names and intended net weight for each pack.
- Bag: preferred format, current dimensions or a link to a bag you like; describe any filling or sealing requirements.
- Material and appearance: paper or film direction, matte or glossy preference, important colors and any performance or disposal requirements.
- Features: valve, zipper, first-opening arrangement and any coding area you want to include.
- Design: logo, available artwork, approved wording and a short description of the look you want.
- Versions and quantities: a list of printed designs and the estimated bags for each one.
- Delivery and timing: destination country, receiving requirements and the date you are working toward.
Add a short list of priorities if you are comparing options. For example, identify whether keeping your current filling setup, giving the front more space or establishing a consistent range is most important. That helps us recommend changes with a clear purpose.
Our custom coffee bag process connects the brief, quotation, design, samples, production and delivery. Production is 7–12 days and shipping is 7–10 days as separate stages; design development, revisions and sample arrangements also need to be considered when discussing your target date.
Frequently asked questions
Can I ask for a quote while the design is still being developed?
Yes. Send the coffee weight, estimated quantities, design count, destination and the bag options you are considering. We can discuss a quote around an identified specification while developing the artwork. If a quoted material, size or feature changes, review the quotation alongside that change.
Can my current designer remain involved?
Yes. Share the available assets and decide who supplies wording and who consolidates design feedback. We can work through the bag drawing and production requirements while your designer helps maintain your brand direction. Identify one current revision for every printed version.
What should I do if my launch date is fixed?
Tell us the date at the beginning, together with which decisions are already made. Design, samples, production and shipping each affect the plan. Discuss their sequence for your project before relying on a production duration as the whole time to launch.
Can I reserve an area for information that changes with each roast?
Yes. Explain which information changes and how you intend to apply it, such as a date code or label. We can discuss the space within the artwork and the selected surface. Check the proposed marking method on an appropriate sample before approving that arrangement.
Further Reading
Start your coffee bag design
Send us your logo, coffee details and the look you have in mind. Include the net weight, estimated quantity for each design and delivery country. If the bag format or material is undecided, say which choices you want help with. Start your design conversation.