
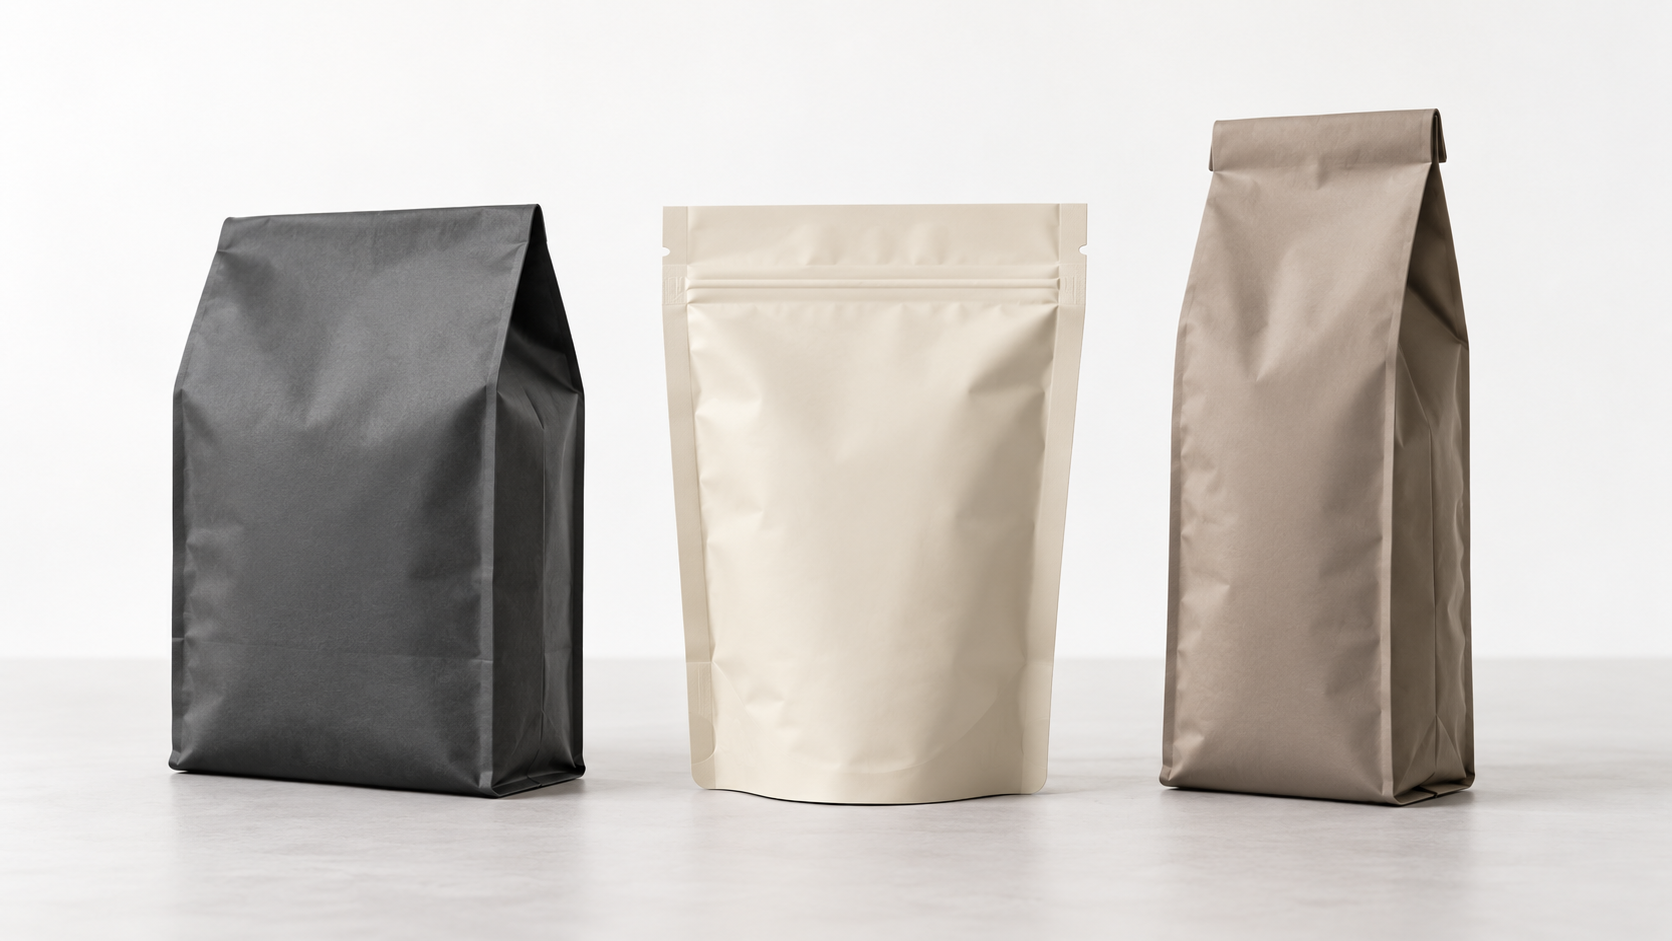
The right configuration gives your coffee enough usable space, fits your display and packing process, and opens the way your customers expect.
We make all three formats. Below, we compare bags we have produced and work through the decisions that turn a preferred shape into a specification. Two of our examples hold 12 oz of coffee; three others hold 250 g in different dimensions. Those examples show why net weight is a starting point for sizing, rather than a complete size specification.
Choose a starting format at a glance
Use this table to narrow your choice before requesting samples. The final construction, material and fill determine how the bag behaves.
| Decision | Flat bottom coffee bag | Stand-up coffee pouch | Side gusset coffee bag |
|---|---|---|---|
| Structure | Formed flat base, front and back, and expanding side panels | Front and back panels with an expanding bottom gusset | Front and back with folds that expand along the sides |
| Display to consider | A defined, box-like outline with separate panels | A broader pouch face with a softer filled outline | A tall profile that can include a folded top |
| Artwork planning | Allocate front, back and side information separately; review the base too | Keep the main message on the front and information on the back | Plan front and back artwork around the seam and side folds |
| Filling question | Does the actual mouth give your funnel or nozzle enough access? | How do the zipper position and side seals affect mouth access? | Can you open and restore the gussets consistently before sealing? |
| Customer opening | Compare the chosen zipper, pocket or pull-tab arrangement | Compare top access and the selected reclosure | Agree first opening and any reclosure with the exact construction |
| Next step | Fill, seal and display the proposed size | Fill and check the expanded base and seal space | Fill, arrange the folds and trial the closing sequence |
Our flat bottom coffee bags, stand-up coffee pouches and side gusset coffee bags pages explain the customization options for each format. Here, we focus on how to choose between them.
Compare coffee bags we have made
These are finished configurations from our coffee packaging work. Their dimensions, films, printing and accessories give you specific references to discuss with us. The two 12 oz bags show different ways to package the same net weight; the 1 kg example shows a larger configuration with a different printing process.
Our 12 oz mono-PP flat bottom bag
We made this digitally printed mono-PP flat bottom bag for 12 oz / approximately 340 g of coffee beans. Its dimensions are 12.5 × 24 + 7.5 cm. We used MOPP / VMOPP / CPP, a 140 µm film thickness, digital printing, a degassing valve and a zipper.
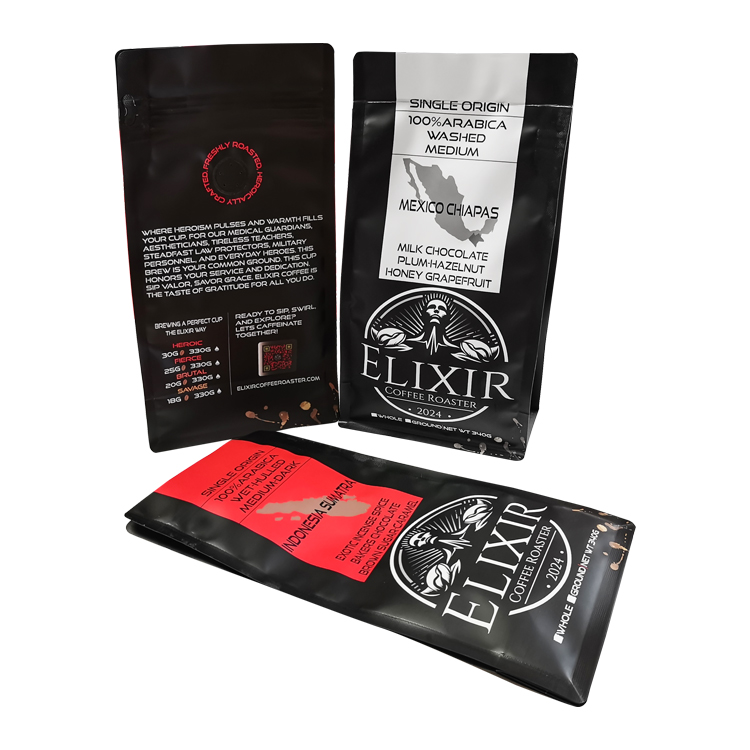
For your own range, this format is worth comparing if you want the coffee name on the front and supporting information on distinct back and side panels. A coordinated design can share the brand elements while changing the coffee name, color or tasting information.
Decide those panel roles before arranging the graphics. The side gussets fold when the bag is empty, and the base is less visible on a shelf. Keep the information a shopper needs immediately on a face they can see. Include the zipper and valve positions in the layout rather than adding them after the artwork is finished.
Our 12 oz MDOPE/PE stand-up pouch
We digitally printed this MDOPE/PE stand-up pouch for 12 oz / approximately 340 g of coffee beans. It measures 15 × 23 + 5 cm, uses MDOPE / PE at 140 µm, and includes a degassing valve.
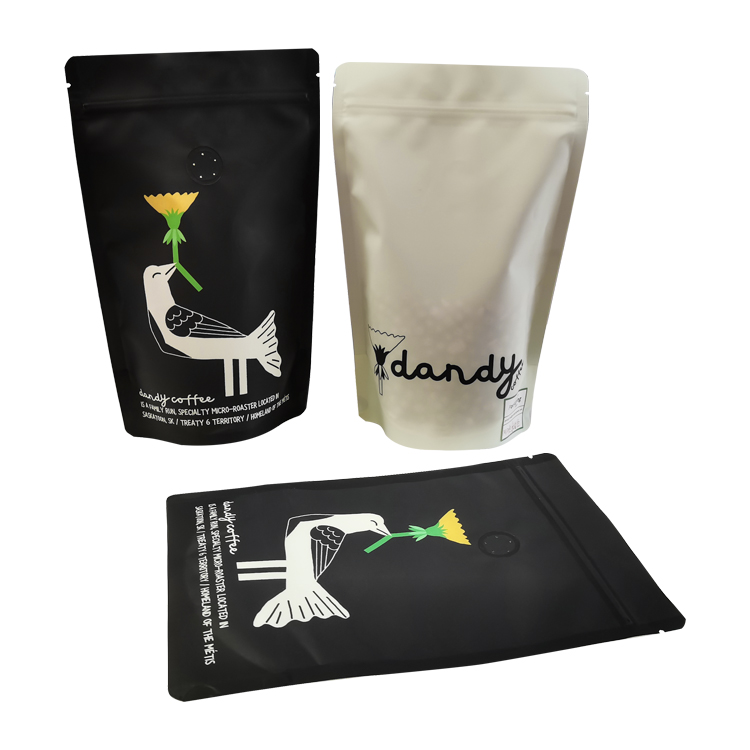
The front artwork provides a useful reference if your design relies on one large illustration or a simple brand mark. With this format, judge the design on the filled pouch as well as the flat layout: the bottom gusset opens, the body gains depth, and the front face can curve.
Both this pouch and the mono-PP flat bottom bag have a 12 oz fill and 140 µm film thickness. Their different structures and accessories still make them different specifications. For your order, we can discuss candidate sizes around one coffee and the features you want, then compare the filled presentation. The common weight does not mean their dimensions can be exchanged.
Our 1 kg MDOPE/PE side gusset bag
We made this MDOPE/PE side gusset bag for 1 kg beans in 14 × 40 + 7.5 cm, using MDOPE / PE at 120 µm. It has gravure printing and a PE degassing valve.
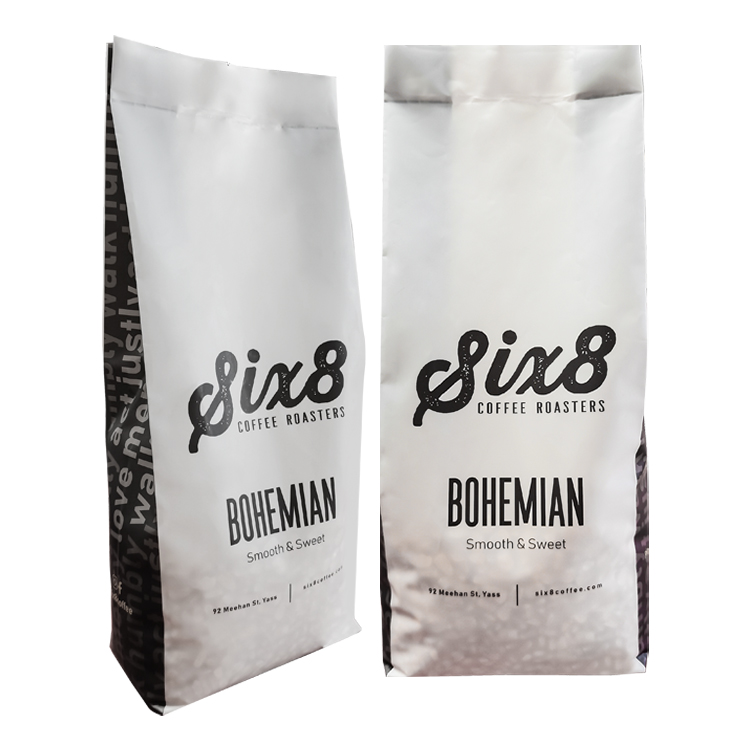
For a larger coffee pack, compare the height with your shelf clearance, filling station and carton. Consider how the buyer will hold the bag while pouring and what happens to the top after first opening. A larger fill does not remove the need to plan those details.
Side gusset bags are not restricted to 1 kg packs or gravure printing. We also made a digitally printed 500 g side gusset bag measuring 10 × 34 + 6 cm, with MATOPP / VMPET / PE, 140 µm film and a degassing valve. Choose the format around your use, then discuss size and printing separately.
Step 1: Define the coffee and net weight
Keep ounces, grams and bag volume separate
Use the weight you will sell, with a clear unit. 12 oz is approximately 340 g, not 250 g. 16 oz / 1 lb is approximately 454 g, not 500 g. A 250 g pack and a 12 oz pack are separate products even if a supplier offers similar-looking bags for them.
Net weight tells us how much coffee must fit. It does not describe the volume inside a bag. Whole beans, grounds and different coffees can occupy different amounts of space at the same weight. The bag also needs room for the filling operation and the agreed closing arrangement.
If a product range includes several weights, list each one separately. Do the same when you sell whole bean and ground versions. That gives us a usable starting point for proposing sizes without treating one capacity label as suitable for every product.
Start with the coffee you will actually pack
Use production coffee for the size review, including the roasts and grinds you expect to sell. Check how it settles under your normal filling method. Avoid pressing extra coffee into a sample simply to make a preferred size appear suitable.
We made a 12 oz ground-coffee flat bottom bag in 13 × 22 + 8 cm, with MATOPP / VMPET / PE, 140 µm film, gravure printing, a valve and a pocket zipper. It is another 12 oz configuration alongside the bean bags above. Use it as a design and size reference, then trial your own grounds before choosing dimensions.
Also tell us when you pack after roasting and, for grounds, after grinding. That information belongs in the valve discussion as well as the filling brief. It helps connect the bag configuration to the way your coffee is prepared and packed.
Step 2: Choose dimensions that leave room to work
Three different configurations for 250 g coffee
A weight label cannot give you one universal width, height and gusset. These three bags we made all have a 250 g coffee fill and 140 µm film thickness, but use different dimensions and configurations.
| Coffee bag | Dimensions | Material structure | Printing | Features |
|---|---|---|---|---|
| Digitally printed matte flat bottom bag | 9.5 × 22 + 7 cm | PET / VMPET / PE | Digital | Degassing valve and side zipper |
| Matte white flat bottom bag | 14 × 18.5 + 7.5 cm | MATOPP / VMPET / PE | Gravure | Degassing valve and pocket zipper |
| Digitally printed kraft stand-up pouch | 15 × 23 + 5 cm | MATOPP / Kraft Paper / VMPET / PE | Digital | Degassing valve and zipper |
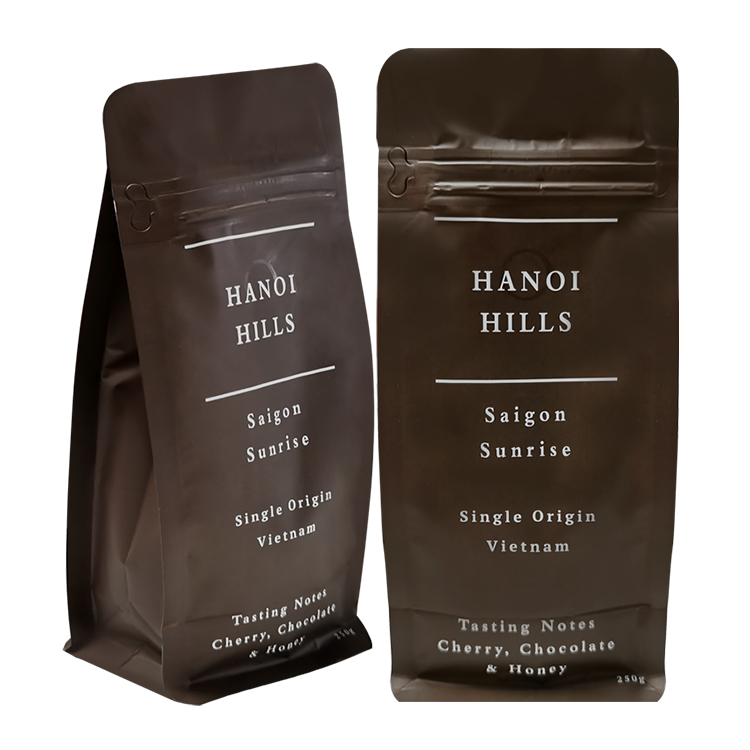
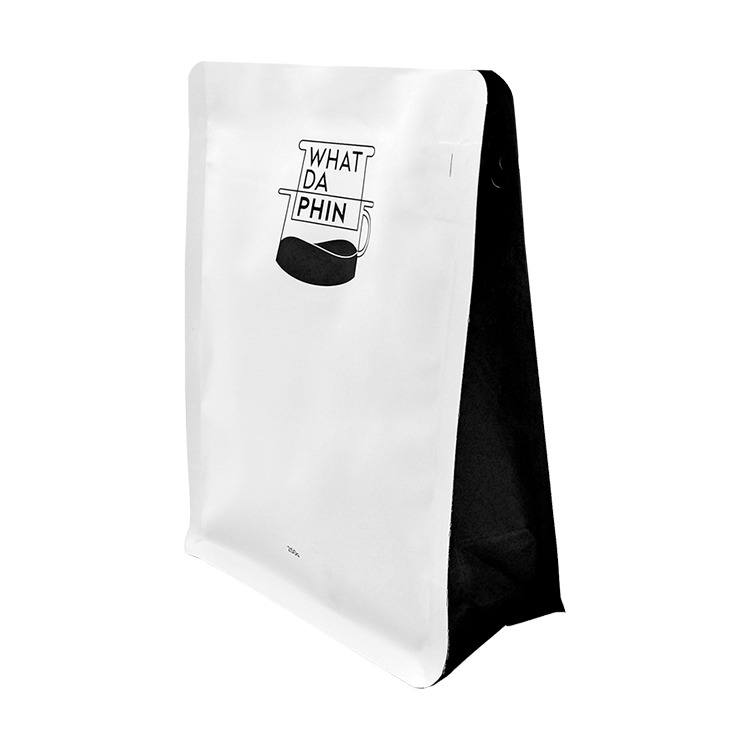
The dark brown flat bottom bag has a different proportion from the matte white flat bottom bag. A kraft stand-up pouch for the same 250 g fill gives you another format to consider.
For your own pack, weigh those proportions against shelf height, front-panel space, opening access and carton fit. The photographs show individual bags rather than a common-scale lineup; use the dimensions and physical samples for a size comparison.
Keep the dimension notation tied to its drawing
The dimensions above retain each project's notation. When you send an existing size such as 15 × 23 + 5 cm, send its drawing or a marked photo too. Establish which values describe the width, height, folded gusset or expanded depth for that construction.
A gusset number can be measured in different ways. Moving it between formats without the measurement references can lead to a different bag from the one you intended. Likewise, outside measurements include seals and other areas that are not available for coffee.
If you use inches or millimeters, keep the units visible on every dimension. For an existing bag, a photo with the measurements marked is more useful than an unexplained sequence of numbers.
Reserve space for filling, features and sealing
Start with enough usable room for the target coffee fill. Then allow for the mouth, any zipper, the valve position and a clear first-seal area. If you plan to fold the top, include the folded presentation too.
Do not approve dimensions because the coffee fits below the rim of an open sample. The bag must still move through the remaining packing steps. Check whether you can bring the sealing surfaces together cleanly, without stretching them around the coffee or pulling folds out of position.
If a candidate is close, describe the problem before simply adding height: does the funnel catch at the opening, does the coffee crowd the zipper, or does the seal lack clearance? The answer determines whether to change the mouth, body dimensions, feature position or filling method.
Step 3: Review the filled bag on the shelf and in the carton
Measure the finished footprint and height
An empty bag's width does not tell you exactly how much shelf space the filled pack will occupy. Fill and close the candidates first, then measure the finished width, depth and height. Use those measurements to compare shelf facings and the clearance below the shelf above.
A flat bottom format is a useful starting point for a defined base. A stand-up pouch builds its standing shape through the expanding bottom gusset. A side gusset bag gains depth through the sides. In each case, judge the specific bag at the intended fill rather than expecting the format name to guarantee stability.
Look at the pack after the coffee has settled as well as immediately after filling. If customers will leave it on a counter after opening, include a partially used sample in the review. You may prefer the initial shelf appearance of one format but find another easier to hold, pour or reclose.
Next, put the filled bags into the carton or subscription mailer you intend to use. Compare the pack count, unused space, folded tops and contact between bags. A taller, narrower bag is not automatically the best use of carton space, and a formed base does not by itself establish a freight saving. Choose the arrangement with the filled samples in front of you.
Give each printed panel a clear job
For a flat bottom bag, use the defined faces deliberately. The front can carry the brand, coffee name and net weight, while the back and sides accommodate other information. Check how the side artwork reads with the gussets expanded. Reserve the base for information that does not need to be visible at first glance.
For a stand-up pouch, start with the broad front and back faces. Keep critical text inside the usable panel area and inspect any graphics extending toward the side seals or lower folds. A design that looks centered on an empty pouch may read differently once the bottom expands.
For a side gusset bag, review the back seam and the fold lines before placing small text or a barcode. Side artwork can work well, but a word running through a fold may become difficult to read when the bag is partly full. If the top will be folded down, view the artwork in that final position.
Place the real retail barcode and variable date or batch-coding area on the proposed layout. Check them on a formed pack. This is a panel-allocation decision; detailed file preparation can follow using our coffee bag artwork checklist.
Step 4: Match the bag to filling and the first seal
Check the usable mouth, not just the outside width
Two bags with similar external width can give your filler different access. Side seals, gusset folds and the selected zipper arrangement affect the mouth you can actually open. Compare that opening with your funnel, scoop or filling nozzle.
For hand filling, try the sequence an operator will repeat: open the bag, introduce the coffee, remove the funnel, restore the folds and present the opening to the sealer. Notice whether beans catch near the zipper or grounds collect on the sealing surfaces. A sample that needs careful reshaping after every fill may prompt a size or opening change before you order.
For equipment filling, send the machine model and the bag requirements supplied by its manufacturer or your co-packer. Include the mouth access, gripping area, size limits and sealing arrangement that affect compatibility. Ask the equipment team to review the proposed drawing and try the candidate material on the line before fixing the bag specification.
Do not choose a format on the assumption that it will run faster. Operator handling and equipment compatibility depend on the complete bag. If packing speed is important to your decision, compare suitable candidates in your own operation using a consistent filling and closing sequence.
Trial the film and folded seal area on your equipment
Agree which opening remains available for filling and which seal you complete afterward. Keep that area free of coffee and bring the material together as intended. On a gusseted construction, inspect the seal where the folded areas meet the flatter sections; do not judge only the middle of the top seal.
Set sealing conditions for the chosen film and equipment. ASTM F2029 explains that both material construction and thickness affect heat sealability, and that laboratory sealing data provide a starting point for production equipment. A material reference is useful, but your packing trial still needs the actual bag and sealer combination.
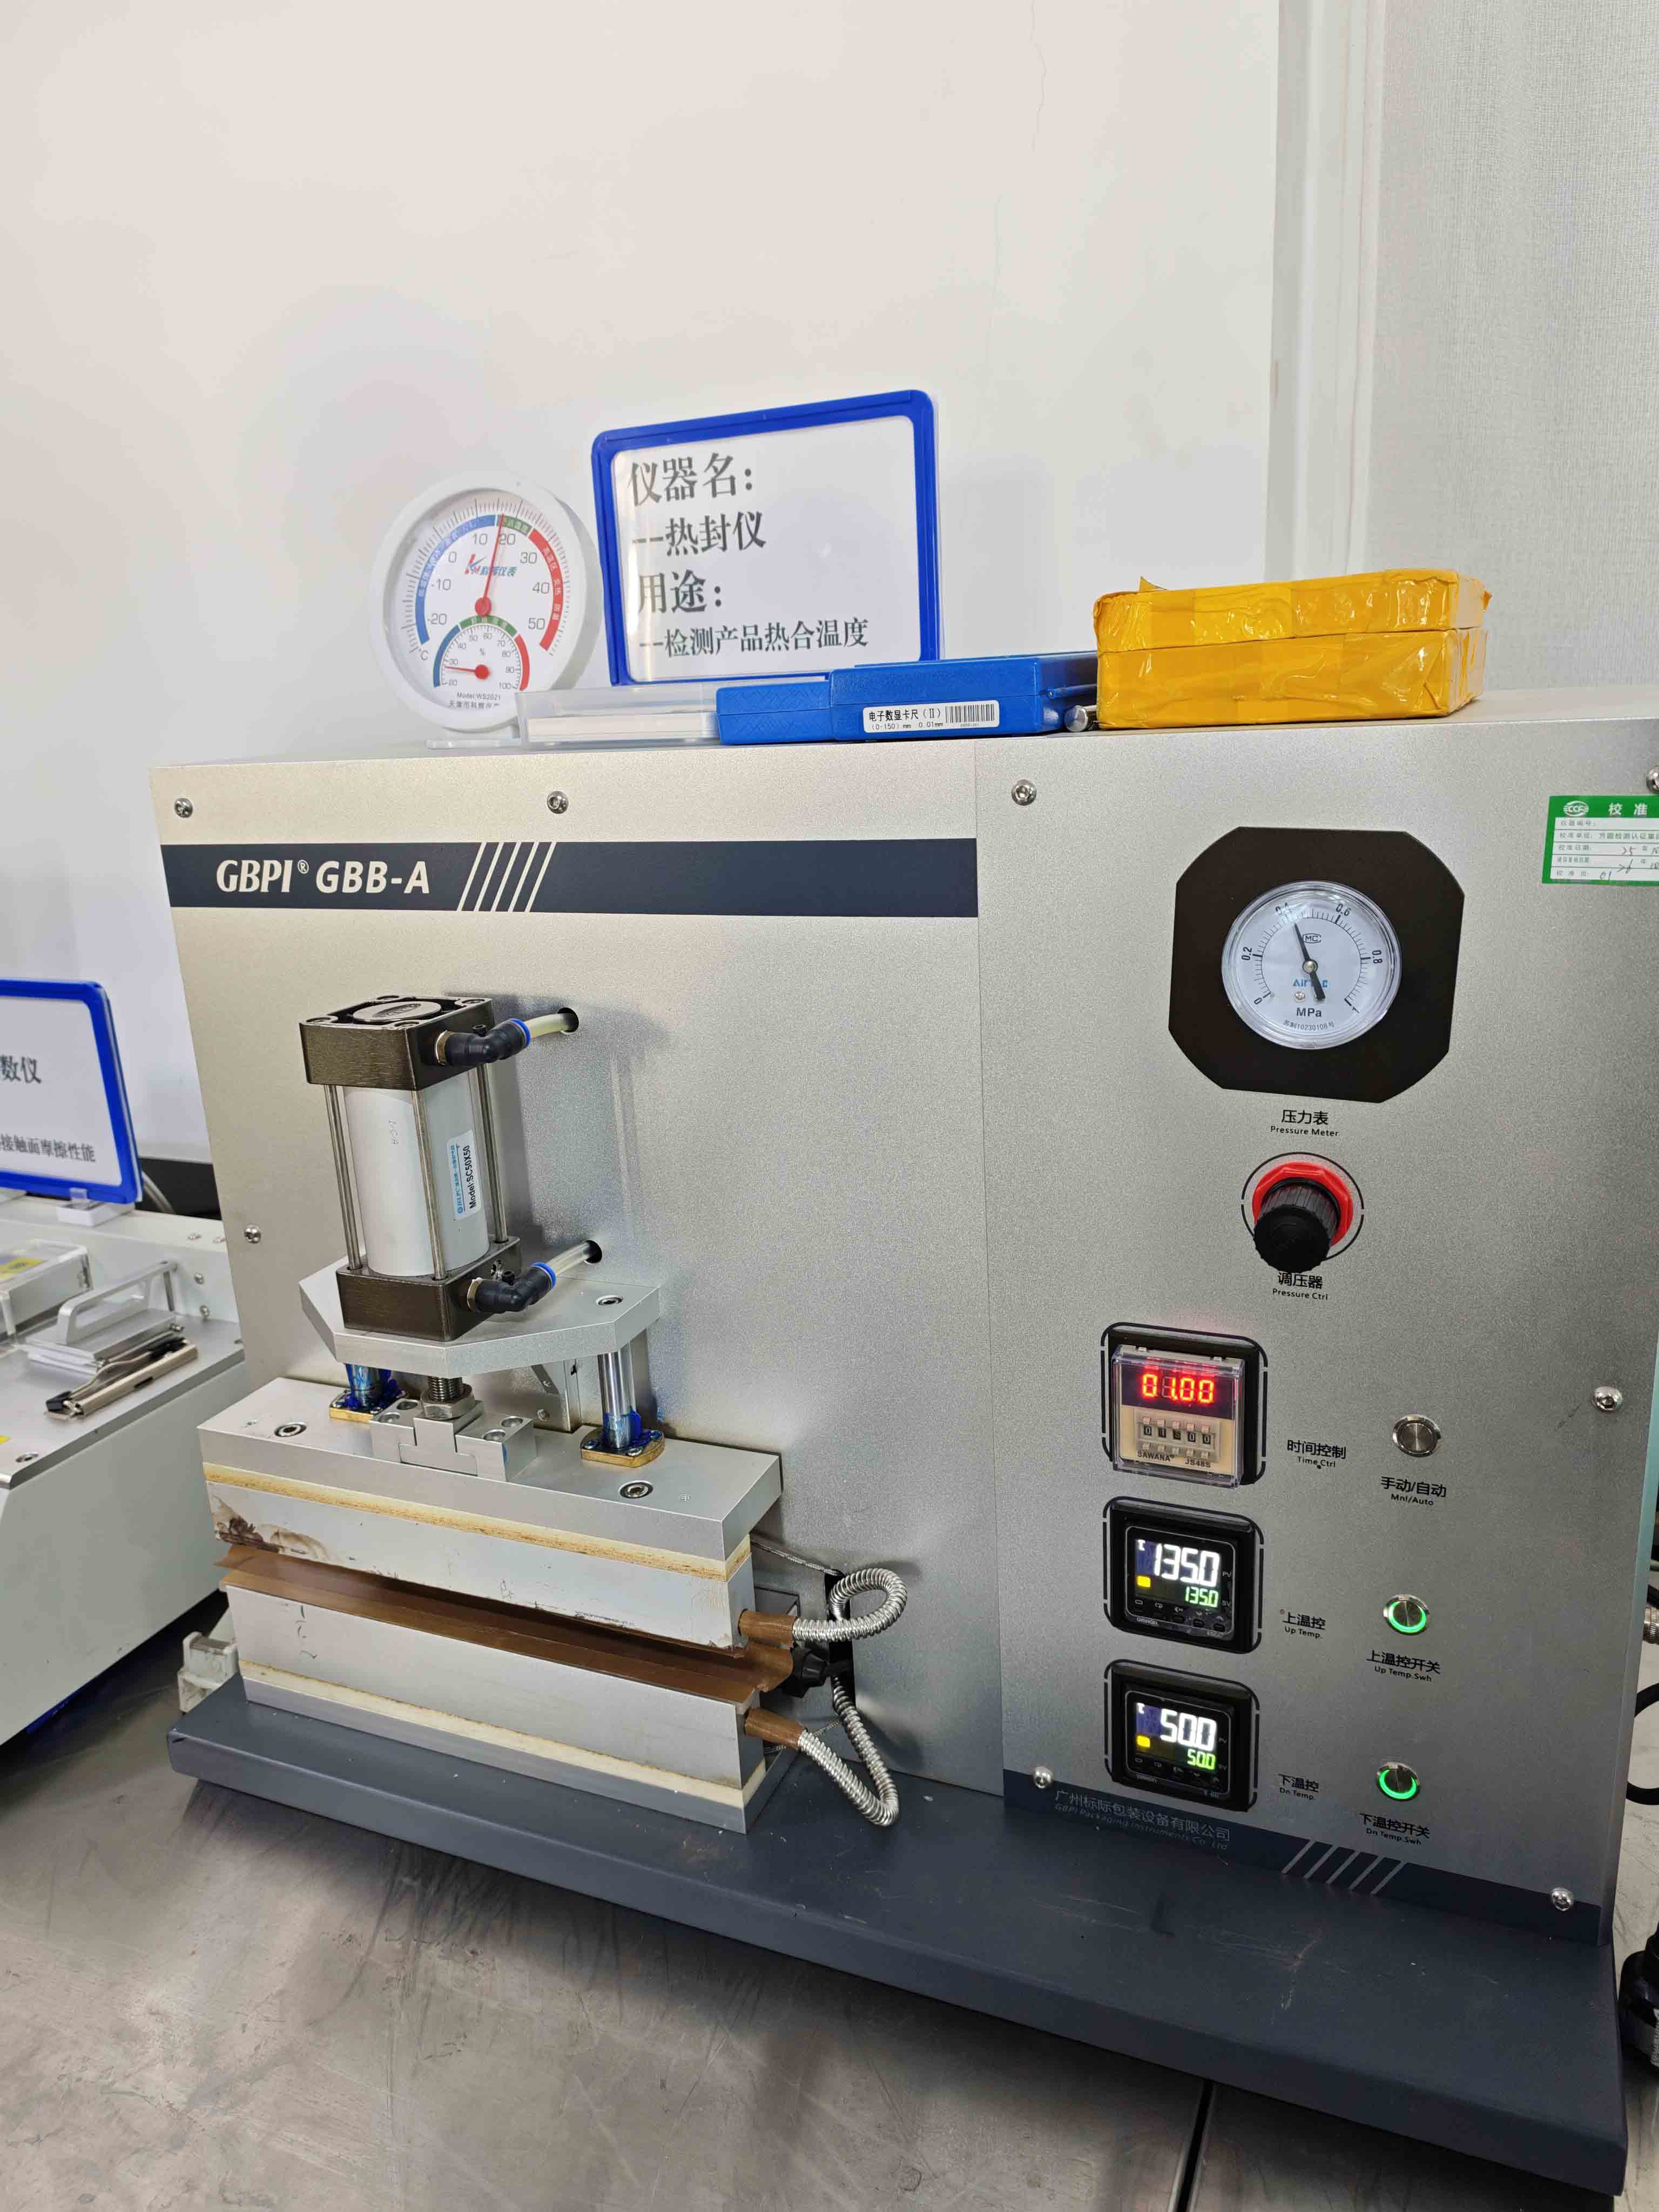
Check for trapped particles, wrinkles and folds that prevent the seal from forming as intended. Where your specification needs a measured seal-strength result, agree the test method and acceptance criteria. ASTM F88/F88M measures the force needed to separate a seal test strip and identifies its failure mode; it is different from looking at a finished top seal or pulling it by hand.
The point of this comparison is to find a bag you can fill and close consistently. For a fuller sample-review record, use our guide to testing coffee bag samples before ordering.
Step 5: Plan first opening, pouring and reclosure
Separate the filling opening from the customer opening
Your team needs access to fill and seal the bag. Your customer needs a clear first opening and, where required, a way to close the pack after taking out coffee. Work through both sequences before selecting the closure.
A top zipper arrangement can give the customer access across the pouch mouth. A pocket or pull-tab arrangement has its own access path. Do not assume the zipper's name tells you exactly where the filler enters, what the customer removes, or which area is heat sealed. Use the selected drawing and a physical sample to follow the sequence.
We made a 12 oz flat bottom bag with a pull-tab zipper in 15 × 26 + 6 cm. It uses MATOPP / VMPET / PE, 140 µm film, digital printing and a degassing valve. The detail below shows how the opening instruction and valve are arranged on that bag.
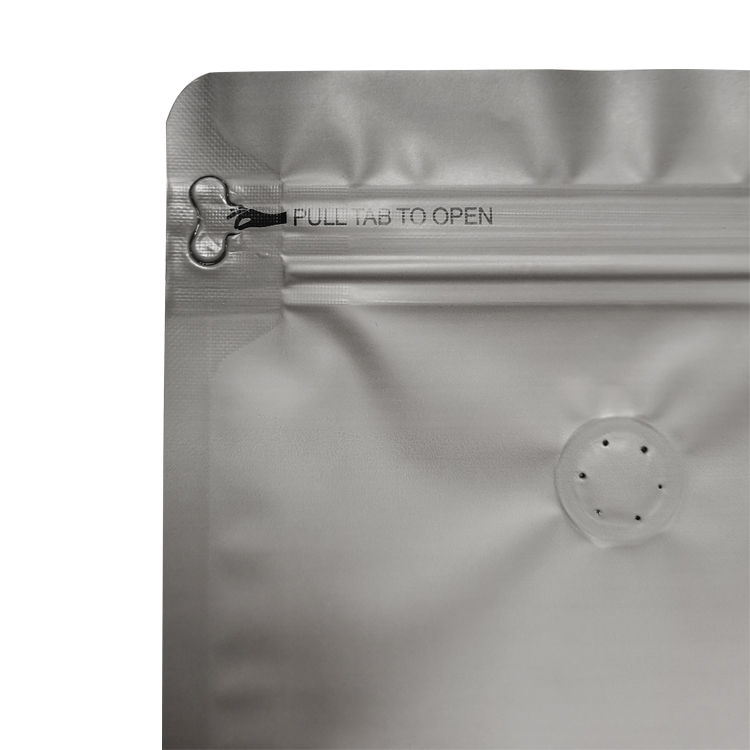
For your own pack, open the sample as a customer would, then pour the coffee into the grinder or container you expect them to use. Check the available opening, grip and reclosure. With grounds, pay attention to coffee collecting in the closure area during repeated use.
A zipper provides reclosure; it does not replace the initial sealing arrangement. A tin tie holds a folded top in place and serves a different function from a zipper. For a side gusset bag, tell us which reclosure you want so we can discuss an arrangement that suits the chosen construction. Reserve enough top area for it before finalizing the dimensions.
Position the valve around the coffee and bag layout
A degassing valve is a separate choice from the bag format. Roasted coffee releases gas, and grinding changes how that gas is released. Smrke and colleagues' coffee-degassing study examines whole and ground coffee under different roasting conditions. For your packaging, discuss the coffee and roast-to-pack timing rather than selecting a valve solely because a bag has a particular shape.
Review valve placement with the fill level, folds, opening and artwork. The one-way valve provides a gas-release route while helping limit air entering through that opening. It does not remove the air already enclosed during filling, replace a clean seal, or compensate for an unsuitable material structure.
For ground coffee, include compatibility with the product and any required valve protection in the discussion. Do not automatically transfer the valve specification from a whole-bean bag. A position that fits the empty drawing also needs to work with the filled and closed pack.
Step 6: Compare materials and printing on the same brief
Keep film thickness separate from barrier performance
Choose the material for the coffee protection, storage conditions, sealing process and appearance you need. Bag shape does not determine those requirements. The three primary examples above use PP-family and PE-family structures; the 250 g examples also show VMPET-containing laminates and a kraft-paper layer.
VMPET is metallized PET, not an aluminum-foil layer. A structure written as PET / VMPET / PE should not be rewritten as PET / AL / PE. Keep the actual layer names in the quotation and approved specification.
Film thickness belongs in a separate field from coffee net weight. Our 1 kg side gusset example uses 120 µm, which equals 0.12 mm. The 12 oz examples use 140 µm. These are specifications of the individual projects, rather than a rule linking a particular thickness to a coffee weight.
Likewise, total thickness does not establish a universal oxygen or moisture barrier. If you need measured barrier data, discuss the complete structure and the conditions and methods used for the data. Set coffee storage and shelf-life requirements separately from a short fill-and-seal trial.
A kraft-paper layer describes part of the construction and its appearance. Our digitally printed 250 g kraft stand-up pouch also includes MATOPP, VMPET and PE. For a recycling or composting objective, review the complete material, attachments and the disposal route available to your customers. Our recyclable vs compostable coffee bag guide covers that separate decision.
Quote the quantity for each artwork version
We offer digital and gravure printing for custom coffee bags. The digitally printed 500 g side gusset bag and gravure-printed 1 kg side gusset bag above illustrate why printing should be discussed separately from format.
Send the quantity for each design, rather than only the total order quantity. Three coffee names with equal quantities are a different brief from one main blend and two smaller runs. Include which elements change between versions and whether you expect regular artwork changes.
To compare quotations, hold the required coffee fill, material requirements, features and design quantities consistent. Ask for the dimensions proposed for each format and identify any differences in the quoted configuration. A lower price attached to a different film, missing reclosure or different quantity does not answer which format suits your brief.
Finally, judge color and finish on the proposed material. A screen layout helps you review text and panel placement, but it cannot show exactly how a matte, kraft or metallized construction will look and feel. Discuss the physical reference or custom sample you need before design approval.
Turn your shortlist into a bag specification
Start with one preferred format and a credible alternative. Remove a candidate if it cannot meet a requirement you cannot change, such as shelf height, equipment access or the customer opening. Keep the remaining choices specific enough to compare.
For a 12 oz retail bean pack, for example, compare a flat bottom bag and a stand-up pouch around your coffee, desired reclosure and artwork. Use our two 12 oz projects as references for shape and material options, then request candidate dimensions for your own fill. Choose the formed panels if they help organize the design; choose the pouch face if it better suits the artwork and handling you want.
For a larger pack used beside a grinder, consider a side gusset bag alongside a flat bottom option. Check the filled height, grip, pouring opening and top arrangement. If it will also be sold on a shelf, include that display rather than assuming a food-service pack has no presentation requirements.
For a 250 g range, the three configurations in our table are useful starting references. Decide whether a narrow, taller bag or a broader, lower profile fits your display and design. Then trial the opening and seal space before treating the preferred dimensions as final.
Keep a brief decision record:
| Item to settle | Record for the chosen bag |
|---|---|
| Coffee | Whole bean or ground, target net weight, and the products trialed |
| Size | Dimensions, units and drawing revision with measurement references |
| Filled pack | Finished shelf footprint, height and intended carton arrangement |
| Material | Complete structure, film thickness and selected finish |
| Packing | Filling access, first-seal location and equipment trial observations |
| Customer use | First opening, pouring access, valve and reclosure arrangement |
| Printing | Artwork versions, quantity for each version and agreed proof/sample scope |
Use that specification when comparing the final quotation, sample and artwork. If a size or feature changes, review the affected areas together. Moving a zipper, for example, can change filling access, usable space and the front-panel layout at the same time.
Send us the details you already know
You can start without a finished specification or print-ready artwork. Send us:
- The coffee type and net weight for each pack.
- Your preferred format, or a link to a bag you like.
- Existing dimensions, a marked photo or a physical-bag reference if available.
- The filling and sealing method, plus equipment details where relevant.
- Your material, finish, valve and opening preferences.
- The quantity for each design and your delivery country.
- Your logo, coffee information and any design references you already have.
We offer free coffee packaging design with unlimited revisions. After you approve the design, we provide layered production files free of charge, matched to the agreed bag dimensions and printing requirements.
Samples of similar materials are free. Custom sample fees are refunded when you place an order. Sample shipping is quoted for your destination. Tell us whether you want to compare material feel, size and filling access, or your own printed configuration so we can arrange the appropriate sample.
Discuss your coffee bag project with our team and share the details you have. We can help you narrow the format, work through the remaining configuration choices and develop the artwork for your bags.
Frequently asked questions
Does "quad seal" mean the same thing as "flat bottom"?
Not necessarily. Quad seal describes a seal arrangement; flat bottom describes the formed-base format. Ask for the construction drawing and a sample showing the base, side folds and seams before treating two differently named bags as interchangeable.
Can one bag design work with different coffee labels?
A shared bag with a changing label can be an option if the coffee weights and required configuration suit the same size. Reserve a usable label area on the formed bag and check it with your actual labels. Decide which information is printed on the bag and which changes with each coffee.
Do I need a separate physical sample for every artwork version?
Discuss the sample scope with us. Versions sharing the same size, material and features may allow the fit review to use a representative configuration, while the text and layout still need review for every design. Changes to the material, size, closure or other functional details may call for another physical sample.
What should I keep for a repeat order?
Keep the approved bag drawing, material and feature specification, artwork versions and sample reference together. Identify the quantities needed for each design. If the coffee, grind, net weight, equipment or configuration changes, describe the change so we can review whether the previous specification still suits the order.
Further Reading
- ASTM F2029: Laboratory heat seals and heat sealability — the scope and practical limits of laboratory heat-seal preparation.
- ASTM F88/F88M: Seal strength of flexible barrier materials — measurement of seal-separation force and failure mode.
- Smrke et al.: Time-Resolved Gravimetric Method To Assess Degassing of Roasted Coffee — the original coffee-degassing research, available through the authors' university repository.
Request a quote for your coffee bags
Tell us your coffee net weight, preferred bag format, quantity for each design and delivery country. Add a size reference or material preference if you have one.